NWslackline guide to longlining (Part 2): Webbing Attachment
Knots and line lockersYou have to attach the line to the anchor sling (and your tightening system) somehow. Since the beginning, slackliners were tying knots and using hitches to rig their lines. Sometime in the early-to-mid 2000s, the use of a chain-link line locker became popular. These reduce the ‘folds’ in the webbing, allowing it to retain more strength, and because they require no knots, everything disassembles very easily when finished. Chain link usage reached its peak sometime around 2008, and then rappel ring line lockers began to replace chain links. Forged rappel rings were better than chain links because they offers more rigging space (sleeved and threaded webbing could be used), as well as the absence of a weld mark meant they were less likely to damage the line. At the time of this writing (May, 2012) forged rappel rings are still very popular for short lines.
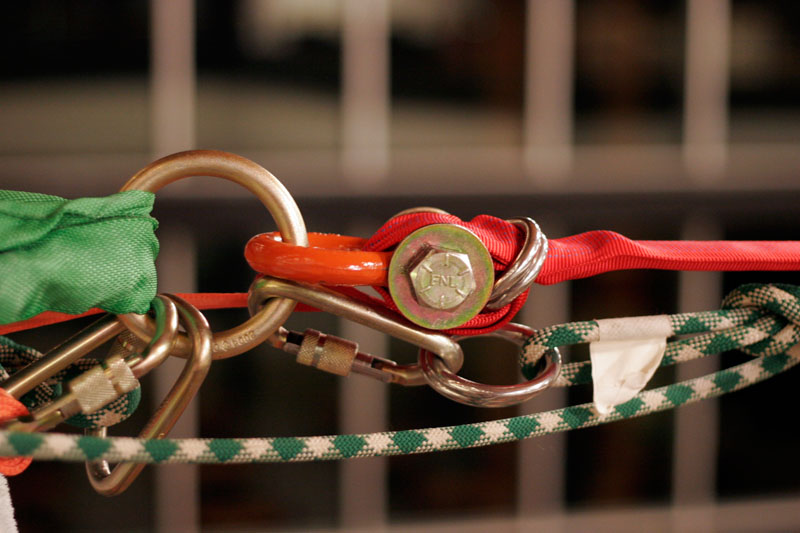
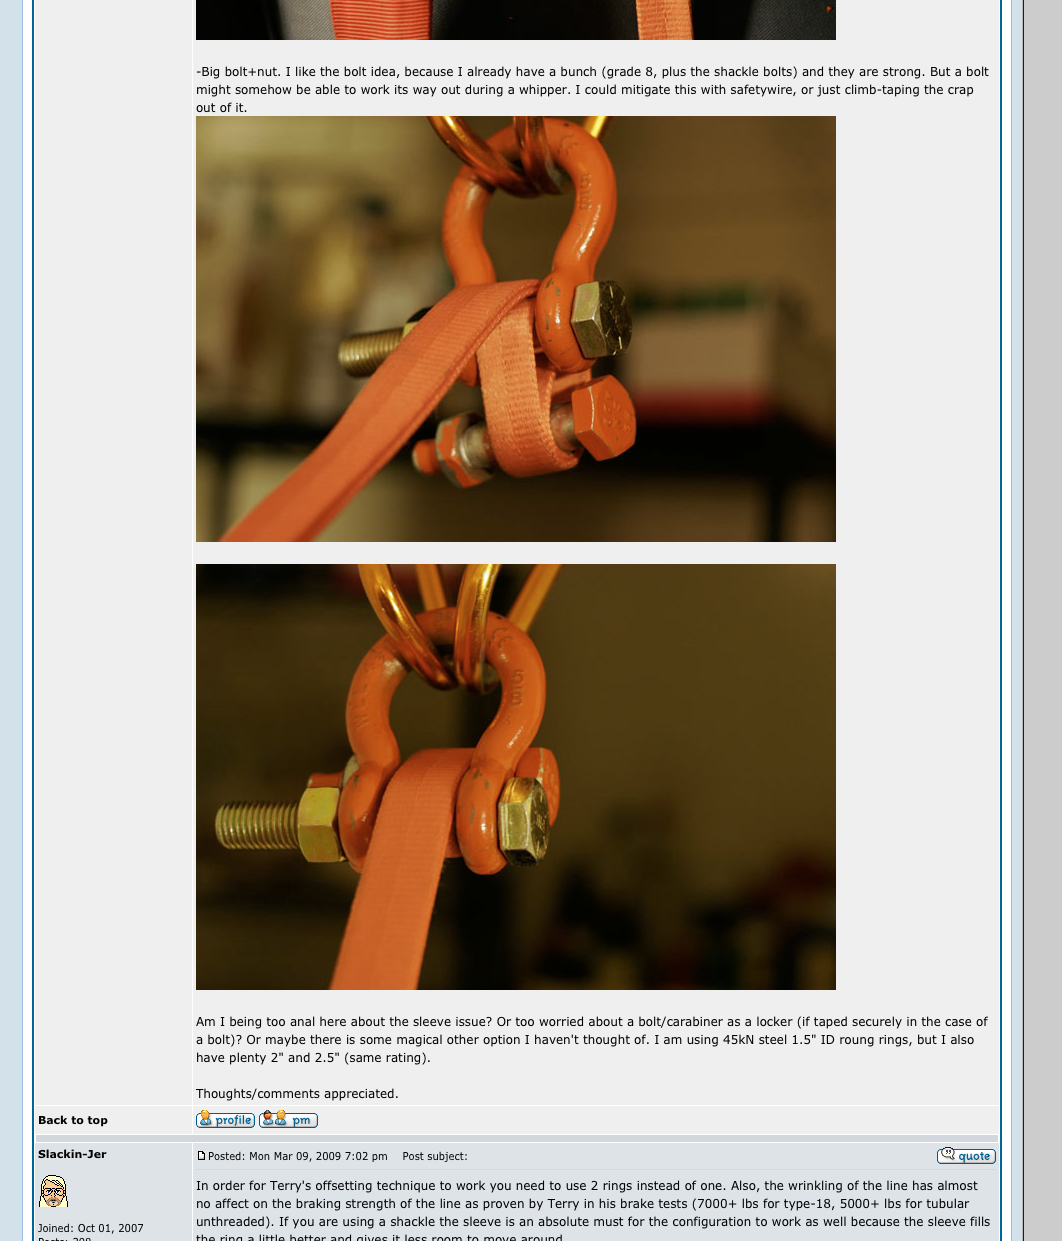
Shackle + sleeve
For longer lines, people began to sleeve their webbing with 1.5 or 2″ tubular webbing and wrap that through doubled-up rappel rings, using 5/8″ shackles instead of carabiners. This is a bomber way to rig nylon long/highlines, but any small adjustment you want to make to the webbing length means you need to disassemble the whole apparatus. It also requires you to factor in the extra slack in the line because you are rigging on the ground (the line is not ‘pre-tensioned’) and this also requires more rope in the pulley system (rope is often at a premium when rigging longlines). If you choose to use a shackle-based line locker, make sure you use brand name shackles — I would not trust anything made in China, it isn’t worth saving $5. The benefit of a shackle is they are cheap ($18ish) and so, so strong (provided you buy a Crosby or other brand name shackle) — like 54,000lb strong (for a 5/8″ shackle). Be aware, there is good preliminary data to support the idea that shackle-based line lockers are only safe (90%+ webbing strength retained) with nylon webbing; polyester webbing should be used with a specialized webbing anchor like an AWL, Zilla, Banana, or Kofi (see below). My two “go to” setups for nylon shackle lockers both use a 5/8″ safety shackle — with this I will use either two 1.5″ inner diameter (‘ID’) forged steel rings, or two 2″ ID forged aluminum rings (purchase here, select ‘M ring’). The smaller rings fit best on a 1.5″ or 1.25″ sleeve (I use the yellow 1.375″ sleeve webbing Balance Community sells), and the larger rings fit best on standard 2″ tubular webbing. In my experience, 3′ of webbing is fine for a sleeve, and usually 2′ – 2.5′ is closer to perfect. If you don’t want to mess with assembling all of this yourself, Jerry at BC sells it as a kit.
‘Banana’ style specialized anchors
Sometime in early 2009, custom-made webbing locking devices began to appear — first homemade ones, then artisan commercial versions. Several of us were dancing around this idea simultaneously — here is a post from me in March 2009 — and it’s interesting now to look back and see how it evolved. The benefit of these modern webbing anchors is that webbing positioning within the anchor is adjustable on-the-fly. This allows one to setup a preliminary rigging of the line between the two anchors, and then pull all the slack out of the line (making it “hand tight”) by feeding the slack through the webbing anchors. I cannot overstate how useful this is. It might seem like a silly little feature, but it saves to much time and helps so much in using just the right amount of rope in the pulleys (so they are closed or nearly closed when the line is at ideal tension). Watch the video to get an idea what I mean (video segment 4 should have a lot of footage that shows how quickly this rigging method goes).
The first of these devices was actually designed many years ago by Scott Balcom, but it is just in the recent past that they have taken off (by making them way more beefy and combining with longline rigging techniques). Over the last two years, many different American and (especially) European versions of webbing anchors have sprung up. A short list includes the slackline banana, AWL, Zilla, Lynx, Monsterlock, lineLock, and probably several more I am forgetting.
Wrap-up
In conclusion: I think there are a lot of good options available for any potential longline. Because the tendency is for newer webbings to be more static (making them potentially dangerous in a shackle-locker), and because adjustable anchors (aka “bananas”) are so incredibly useful, I think it’s clear this is the right decision for most new longliners. The extra $50 between a shackle kit and a lower-cost adjustable anchor may sting a little upfront, but rest assured you will be using this anchor for years to come, and you will save incalculable amounts of time dialing-in your rigging thanks to the ease of adjustability.
Lastly, we want our gear to be strong (which webbing anchors and shackles both are), and we want either to eliminate multidirectional loads with smarter rigging (passing a spanset through a ring and clipping it to itself as I did in segment 1), or use rigging hardware rated for multidirectional forces (such as a 5/8″ shackle line locker, or the stainless shackle that comes integrated into the AWL).
This video segment teased my own banana-style web lock device a little bit. I call it the Kofi, and I’ve spent the last few months tinkering with various sized rollers and pins, different width webbings, different hole spacing and orientation, and so on. I will have a good amount of data to share publicly soon, but first we must finish our longlining guide; on to Part 3: Webbing!
Thanks for posting this series of videos – I’ve found it very helpful so far as I transition to longer slacklines.
I’m curious about the webbing anchors you mention. Where does webbing fail in these devices? At the point of maximum curvature? At places where it is pinched under other layers? Do you have any data yet about how different threading patterns behave?
Excellent work Adam. Looking forward to the next video.
No mention of the lockman (landcruising) type anchors though??
Pretty common over here in UK and Europe.