Article: Using line lockers
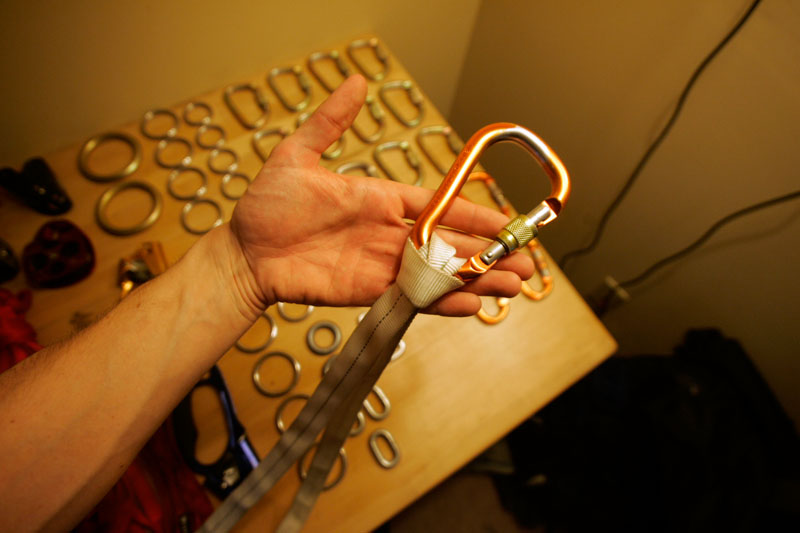
Normally you will require a couple of knots in a slackline in order to rig it properly. Each end of the line must attach to your anchor slings somehow, and often a clove hitch is used to attach it to a carabiner (which is then clipped to the sling). Some of the “kit” lines have a loop sewn at one end, which is really nice, but sewn loops can’t totally eliminate the need for knots/lockers.Here is a photo of a clove hitch in a slackline. There’s nothing ‘wrong’ with knots, but they reduce the break strength of the line, which goes against my ‘safety nazi’ nature; plus, knots can be a pain to get out, whereas lockers can be removed with little effort. So, if you haven’t tried lockers, I highly recommend them.
What kind of lockers to buy? — You have a couple of options.
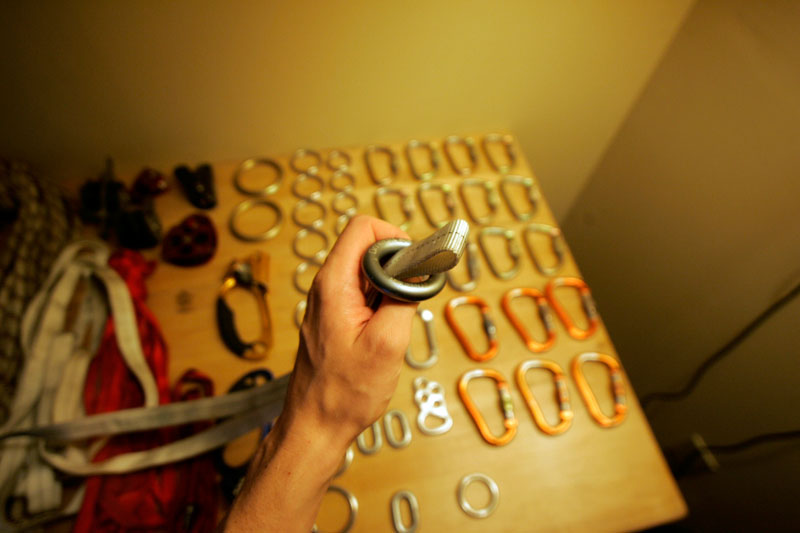
Forged Aluminum: Most easily available are the forged aluminum rappel rings (also called “rap rings”) available from any climbing supply place (like REI). These will run $3-4 each, and should be sufficient. They come with warning materials that they are for “shock loads only,” which does give me some worry, but I have seen many people who have used them constantly for years (including on highlines!) before they get bent up enough to require retirement. Basically, the tradeoff here is that they are readily available, but technically not the best choice. Again, it’s unlikely they will ever break, but life comes with no guarantees, so I eventually moved on to using steel hardware (which is stronger, and more likely to bend than outright snap if it is overstressed). Look at the photo above and note the small “dings” that the OP locker has on it… these were caused simply by tension against the carabiner when the line is rigged.
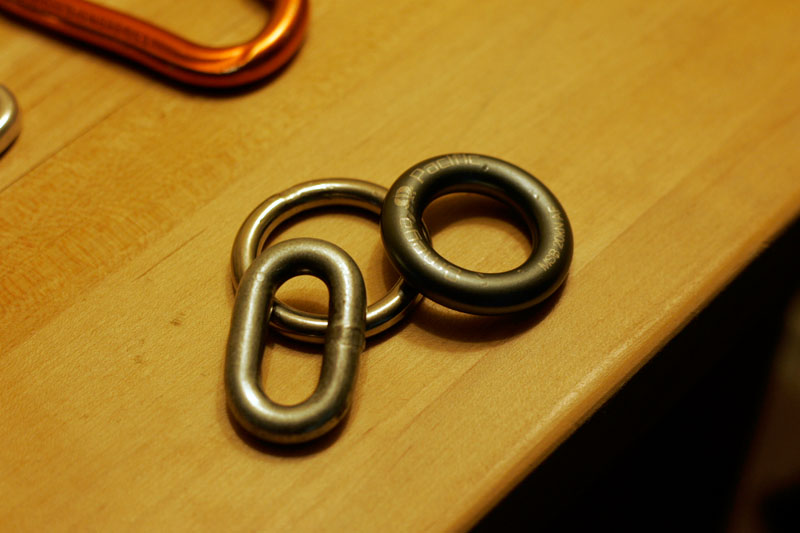
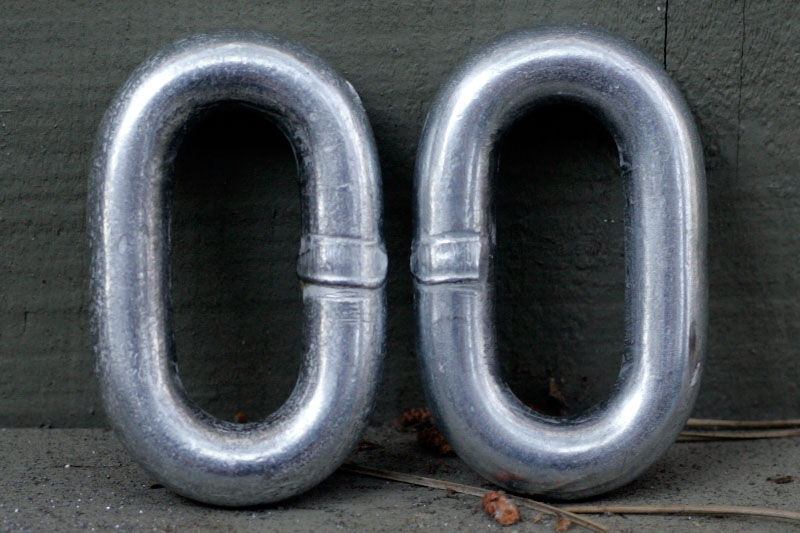
Steel Chain Links: If you go to Home Depot or a similar hardware store, chances are you can track down a 5/16″ or 3/8″ steel chain that will work as a locker. It’s a good idea to bring a piece of slackline along to verify it will fit *before* you cut and buy the chain. The chain you want will have at least 3,900 pounds of WLL (working load limit). Normally WLL is rated for a safety factor of 5:1, which means that it can safely carry loads of 3900lbs, but will likely sustain 5x that load before snapping. Sometimes WLL can be 3:1, and in life-critical applications it’s often 15:1. Even if it was 1:1, 3,900lbs is plenty (and the chain I use is 5,400lbs). Something like this. It will run around $3/ft, and you can get about 5 links out of each foot. You need to cut every other link (obviously). If at all possible, I use the machine in the store to do this when no employees are looking (saves a ton of time). Home depot is great for this, as their employees tend to be extremely apathetic and disinterested (I have cut lockers from lengths of chain on the “Employees Only!” machine on several occasions, with a Home Depot employee in the aisle, not noticing or caring as to what I am doing). Chain links have two drawbacks. 1: I’ve heard they will rust, although I have not had this problem (I’ve used zinc-coated chain, though). 2: Each link will have a somewhat smooth “weld” on it. This weld will eventually rub your line and start to damage it (due to the tension involved). To avoid this, you will need to purchase some small files (I bought a medium 1/2″ wide flat metal file, and a triangular 1/4″ wide soft file) and spend about 10-20 minutes filing the part of the weld that can touch the line. (Coarse/Medium file first to remove most material, then finishing file to polish smooth) Here is a close-up of two links, the link on the left is un-filed, and the link on the right has just been filed. Places like Slackline Express sell pre-filed links, if you are lazy.
Steel rap rings: The best solution, imo, is using a steel rappel ring. These run $3-9, and are really strong. Mine are made from Stainless 304 steel, and will support 44Kn. The inner diameter isn’t quite as well fitted to 1″ tubular line as the Omega Pacific rings, but they still work great.
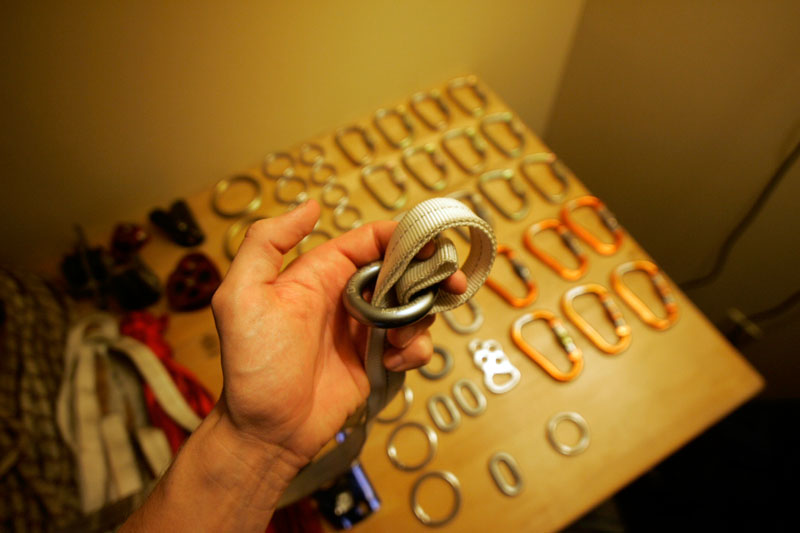
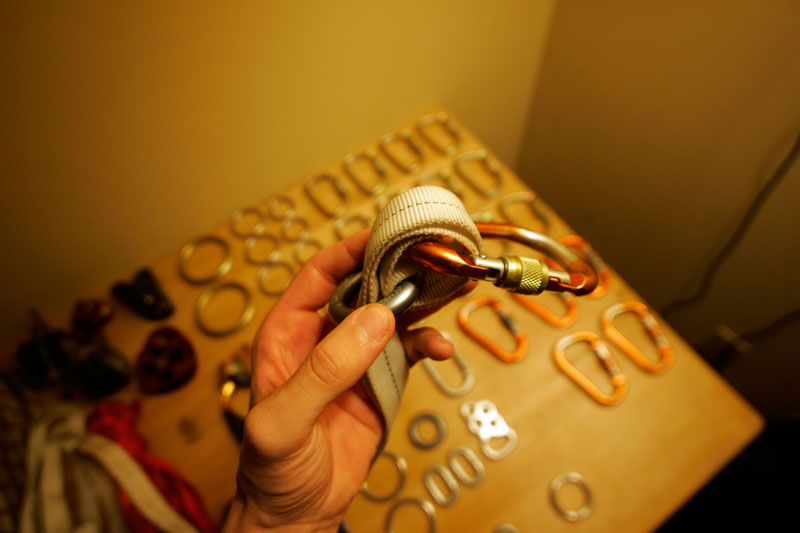
Whichever type of lockers you choose, here’s how to use them.
1: Fold the line over itself and pass it through the underside of the locker
2: Pull about 5″ of the line through the locker, wrap it forward and below the locker and pass it through again..
3: Grab a carabiner, and clip it through the center of the slackline loop.
4: Pull tight, and “dress the line,” working any minor folds or aesthetic blemishes out of the line passing through the locker
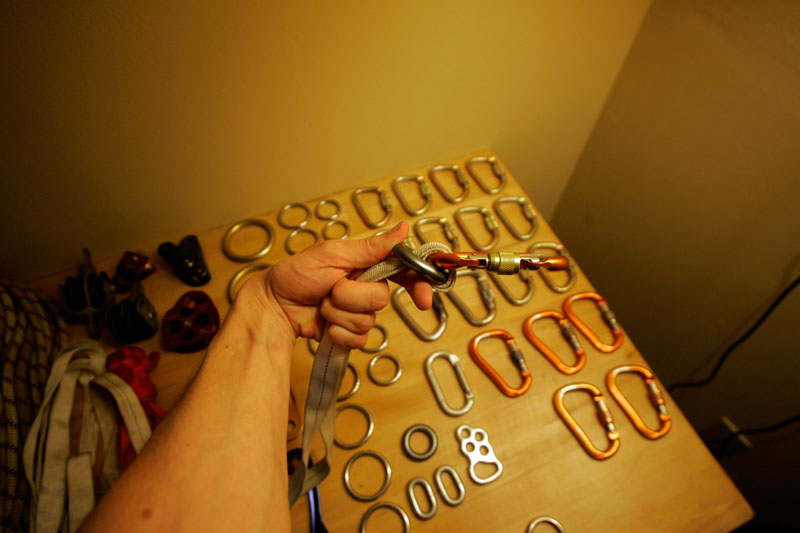
5: (optional) I would always leave at least 6″ of “tail” hanging out of the end of the locker. By this, I mean, if you are using the locker to attach the end of the line to an anchor, leave a little bit of extra line dangling out, so if it somehow did slip a bit, it wouldn’t pull out of the locker. For highlining, I do use lockers. This is my personal decision, and I am in no way advising it for you. This is not advice for rigging a highline. In the case of my lines, I use a locker, and leave several feet of tail, which I then tie a backup knot and secure to a secondary anchor (premise being that if either the main anchor failed, or the locker failed, this knot to second anchor could save my bacon).